Step by Step Process to Install Red Hat Enterprise Linux 7.3
Red Hat Enterprise Linux (RHEL) is an Open Source Linux operating system developed by Red Hat. RHEL is most popular operating system in today’s world for major deployments. Here i will explain step by step process to install Red Hat Enterprise Linux 7.3 on your virtual machine.
How to Install Red Hat Linux 7.3?
I have performed this installation on one of my virtual machine that are hosted on my local computer. If you want to create new virtual machine to install Linux 7.3 operating system you should read its step by step process in attached link.
Once you have created your virtual machine with RHEL 7.3 setup, installation media will automatically be detected and let you proceed with the installation. This is because you have already selected RHEL 7.3 ISO during virtual machine creation. Make sure you have downloaded correct RHEL setup file. Below is the image of correct setup file.

Now let us proceed with the installation. You will get below image to proceed with the Linux installation once you finish creating a virtual machine.

Press enter on first option “Install Red Hat Enterprise Linux 7.3” to proceed with installation. If you will not press enter, setup will start automatically after 1 minute. Now you will get below screen which says to press enter again.

Once you press enter, a series of updates will process on your screen.

You will get below screen to choose the language in the next window. Here choose your language in which installation texts will proceed and click on “Continue” button to proceed.

Next window will be “Installation Summary” window from where we will configure all configurations for this installation. You can see “Begin Installation” button is showing disabled on this window. It will enable the moment we configure all parameters. We will click one by one to each option and then configure them with the correct value to proceed.

Let’s start the configuration one by one. First click on “Date & Time” option to set the server clock according to your time zone. As i stayed in India so i have chosen region as Asia and city as Kolkata and then set the time and date in the bottom of below screen. Now click on done button given top left side of the below image.

Now click on “Keyboard” option to set the keyboard option as shown in below image. Click on plus sign if you want to choose some other settings. Click on done button to apply this change for the installation.

Now click on “Language Support” option to set the language for this installation. Choose your language and click on done button to proceed.

Next option in installation summary window is to select correct installation media. I did not make any changes here because it is already selected as local media which we had downloaded from Red Hat website.
Now click on “Software Selection” to choose what type of installation you want to proceed. I selected minimal install to proceed. If you want to install GUI based Linux server operating system you can choose last option of below screen. Once you made your selection click on done button to proceed.

Now we will configure the “Installation Destination” option.Here we have also an option to configure storage partitioning. If you want to add some other disk you can do that as well from this page. I have selected 20GB for this Linux server so it is shwoing there. Now come to the storage partitioning section which is in bottom of the screen, i have selected “Automatically configure partitioning“. Setup will configure all the partitions automatically during installation. If you want to configure it manually you can choose second option that will allow you to configure as per your need. Click on done button to proceed, once you have made all changes.

Now there are only three option left to configure as per below image. These are Kdump, Network & Hostname and Security Policy. You can see rest of all options are showing with their configured value.

Now click on KDUMP option. Kdump is a mechanism which captures information from your system during system crash that can be invaluable in determining the cause of the crash. I have enabled this option. If you do not want to enable it you can uncheck it. Click on done button to proceed.

Now click on “Network & Host Name” option. You will get below image to configure it.

Now click on on/off button showing in top right side of above screen. It will automatically assign IP address, subnet mask address to make connection. I have enabled it and you can see all address in below screen. You can also change the hostname of Linux server. Write the server name in the host name section and click on apply button.
If you want to assign IP address, subnet mask address and other details manually you should click on configure button on below screen. Click on done button to proceed.

Final option is to select appropriate Security Policy. I did not make any changes and go with default option as shown in below screen.

Now we will click on “Begin Installation” to start the installation.

Once installation will begin, you will get below progress status bar along with options to set Root Password and User Creation.

Click on Root Password option of above screen to set the root password. Click on done button once you have entered the password.

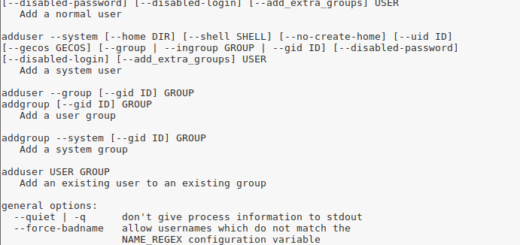
Now click on User Creation option to create an user. I have created an user named techyaz as shown in below screen. Click on done button to proceed.

Now you can see text written in red colour is disappeared from root password and user creation options. Installation is still in process during the user creation. You can see below screenshot.

Once installation will be completed below screen will come that will say that installation of Linux 7.3 operating system is completed.

Now Reboot button is enabled and setup also suggested to reboot the server. Click on reboot button to restart the server. Your Linux installation has completed here.
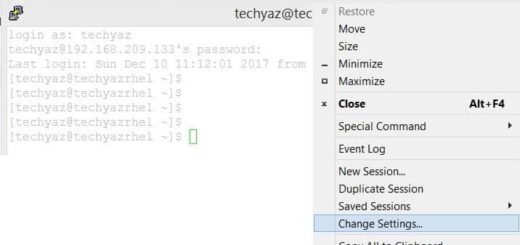
Now we will validate the installation by running few commands. Once server will come online post reboot, it will give you below prompt to enter the login credentials.

Enter the user name which you have created during installation. You can see now i have connected to Linux server using user techyaz.

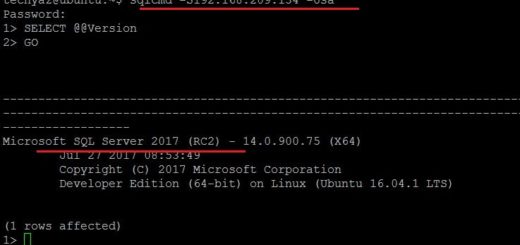
Now you can check the hostname and RHEL version installed on this machine by executing below commands.

Now we can see the output which says host name as SQLServerRHEL and its version RHEL 7.3 in above image.
I hope you like this article. You can comment about your questions in comment section. Please follow us on our facebook page and on Twitter handle to get latest updates.
Read More:
- RHEL Interview Questions & Answers
- Step by Step Process to Install Ubuntu Linux 16.04
- How to Install and Use Htop to Monitor Linux Processes?
- How to Install Zabbix on Linux Machine?

- How to Fix SQL Error 1005: A Comprehensive Guide - April 9, 2023
- How to Fix SQL Server Error 207 – Invalid Column Name - April 9, 2023
- How to Fix SQL Error 1045: Resolving Access Denied Issues - April 8, 2023