How to Fix PuTTY Connection Issue Network error: Connection timed out
I explained how to installed RedHat Linux on a virtual machine in my last article. I was not able to connect to this Linux server from PuTTY terminal that was installed on my host machine. Everytime i tried to connect to Linux server i got “Network error: Connection timed out“. Here I will explain how to fix this connection issue “Network error: Connection timed out”
Network error: Connection timed out
I faced this issue during making connection to Linux virtual machine from PuTTY terminal that is running on host computer. I got below error during this operation. When i tried to ping the Linux virtual machine from host it was failed and shown request timeout.
Network error: Connection timed out

I did some research over internet and found lot of solutions and reason behind this issue. Some people suggested to check and disable all firewalls and some has suggested some other solutions. Most of solutions have failed to fix this issue.
I discussed it with one of my friend who works in VMware domain, he suggested only one solution to check the IPs of host and virtual machine that should be part of same subnet. I apply his solution and it worked. Here i will explain the fix of this issue.
Let’s check the IP of local host on which Linux virtual machine is hosted. Run ipconfig command to get these details.
#Check Host IP
ipconfig
We can see the IP details of the host computer. We can see the range of IP is 192.168.209.1 & subnet mask is 255.255.255.0

Now we will check the IP of the Linux virtual machine which we generally give during the installation. Run ifconfig command on your Linux machine.
#Check Red Hat Linux Server IP
ifconfig
You can see the IP of this machine is 192.168.0.1 that belongs to different IP range. This is the main issue behind this error. Our next step to change the IP of Linux machine to same IP range under which host is running.

Solution
The solution of this issue is to change the IP of Linux machine to the same range on which local host is running. We can see the connection interface name is ens33 from above screenshot. Next step is to connect to Linux machine and set the new IP for this connection interface name. Run below command to get this done.
#Change the IP of connection interface name ens33 to 192.168.209.10.
sudo ifconfig ens33 192.168.209.10 netmask 2555.255.255.0

We can see command executed successfully. Now we can validate this change by running ifconfig again and you can see the IP is changed to 192.168.209.10 now.

Now we can go ahead and connect to this machine from host computer. Launch the PuTTY tool and enter the IP of the Linux virtual machine and click on open button as shown in below screen.

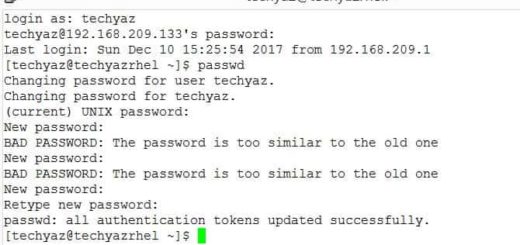
Once you click on open button, another window will come and ask you to choose Yes to proceed. Click on Yes button of this screen to proceed. Once you click on Yes button, you will get a login window which ask you to enter a correct login id and password to connect to Linux virtual machine. I did the same and you can see i have successfully connected to the Linux virtual machine from my host computer.

Now issue is fixed and you can do anything as per your requirement on the Linux virtual machine from your host computer using PuTTY terminal.
I hope you like this article. Please follow us on our facebook page and on Twitter handle to get latest updates.
Read More:
- Fix PuTTY Network Error: Connection Refused While Connecting to Ubuntu Server
- How to Change PuTTY Text Color?
- How to Change Putty Cursor or Mouse Pointer Color?
- Change PuTTY Background Color

- How to Fix SQL Error 1005: A Comprehensive Guide - April 9, 2023
- How to Fix SQL Server Error 207 – Invalid Column Name - April 9, 2023
- How to Fix SQL Error 1045: Resolving Access Denied Issues - April 8, 2023

BAD! you also have to set BOOTPROTO=”static”. If you dont, when you restart network, the ip would have changed again.
its totally bad idea don’t go through this u will lose your server network